Prepare Tampura sound samples

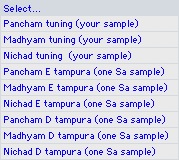
First, you need to download tampura sound samples from our web site. Save them on your computer. Note that when you install Tampura Generator on your computer, some sound samples are automatically installer. Under Mac OS X, there are installed in the Tampura Generator folder (in Applications). Under Windows, there are intalled in a Tanpura sound sample directory on the Desktop.

Valid sound samples are WAVE or AIFF sound files.

How to configure a tampura, with up to five strings

Assign a sound sample to a string

Then, you have to assign the sound samples to all the strings. You have two options for that:

  1. PuceClic on the button 
      to open a sound file selection dialog. Then select a sample.
  2. PuceIn the Finder or Explorer, select the sound sample and drop it on the string with the mouse.

  3. PuceYou should NOT assign mono sound files to some strings and stereo sound files to others. They MUST be all mono or all stereo.


Open sound sample selection dialog

Switch On/Off a string (hidden if the Synchro is ON)

Switch On/Off the Tampura

Volume slider

Volume lever meter

Gap between strings, before the next stroke

Whole tampura pitch controllers

Pitch and fine tuning controllers

Reset buttons

Visit our web site: http://tampura.bzhtec.com   Contact us: tampura@bzhtec.comhttp://tampura.bzhtec.com?subject=%5BBZHTEC%5D%20Query%20about%20Tampura%20Generator%20Softwareshapeimage_19_link_0shapeimage_19_link_1

Assign a sound sample to all string

You also have the option to assign a same sound sample to all strings, in one operation:

  1. PuceClic on the Main button 
      to open a sound file selection dialog. Then select a sample.
  2. PuceIn the Finder or Explorer, select the sound sample and drop it on the Main volume fader with the mouse.


Setting the volume of each string

For that, use the volume slider of each string, and a main volume slide. Selecting a volume of 0 DB means that we keep the sound volume as it is recorded in the sound file. You can amplify the sound, by moving between 0 to 6 DB. You can reduce the volume by moving down the volume slider. The main volume will be applied on the tampura stereo output, after mixing all the string sounds. You should set the string and main volumes to acceptable values which prevent saturation. The saturation is visible when the level meter is red.

Removing one String

By default, the tampura has 5 strings. You can switch Off one or more strings. When a string is switched off, its configuration is hidden.

Configuring the tampura cycle

To configure the tampura cycle, you have to define a gap between each string, before the next string stroke. The length of the sound for each string depends on the sound file duration. As for a real tampura, each string will produce sound until the next stroke for this string or until the end of the sound sample.

Quick Tuning

You can quickly configure a tampura with the Quick Tuning box. Clic on the box and select the tuning you want to apply.

Panner

With the panner, you can move the tampura in the Stereo space, from Left to Right.

Mono/Stereo

If your sound samples are in mono, then select Mono here. If you don’t do this, your tampura will be mono.

Quick tuning

With this tool, you can tune a tampura in just a clic. A few common tunings are provided:


(your sample) means that this tuning will not load any sound sample. All other tunings will load the appropriate sound sample from the sound sample folder.


Random note length changer